Dear Strida fan,
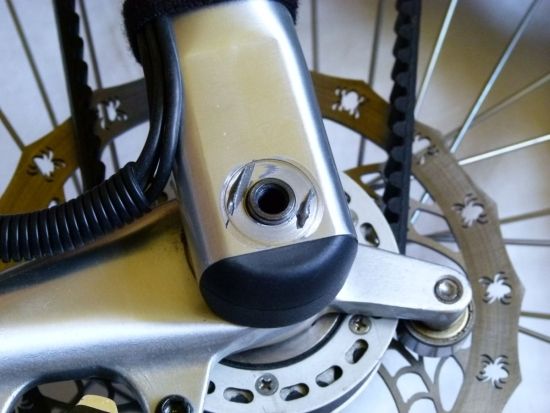
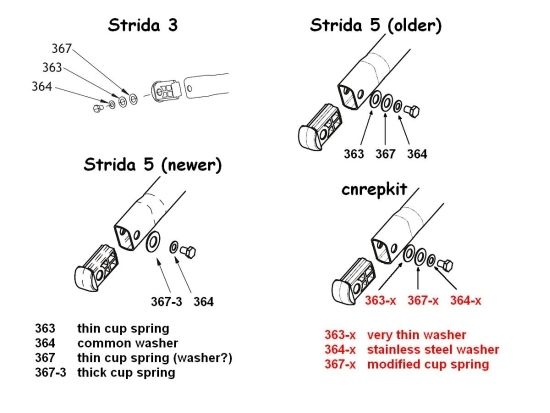
this kit is intended for the creaking/crackling noise issue which appears mostly while pedaling under high load, caused by the sharp edge of the cup spring p. nr. 367 (363 + 367 for older 5.0 Strida).
Components of the Standard version:
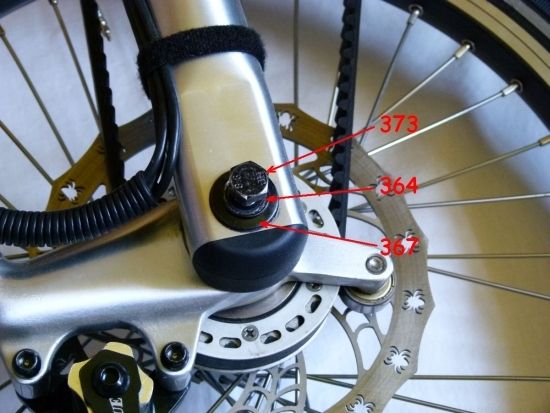
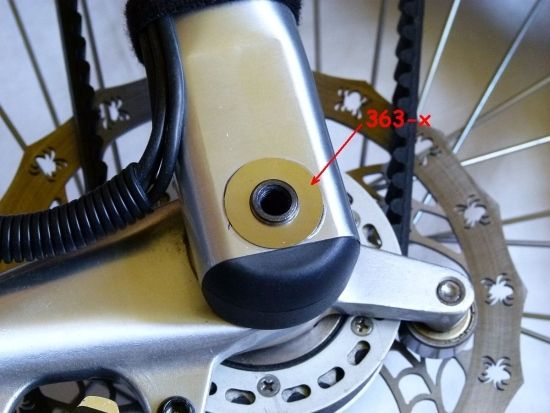
- 363-x washer ~ 12 x 25 mm Ø, laser cut 1.4310 stainless spring steel of 0,2 mm thickness (as a
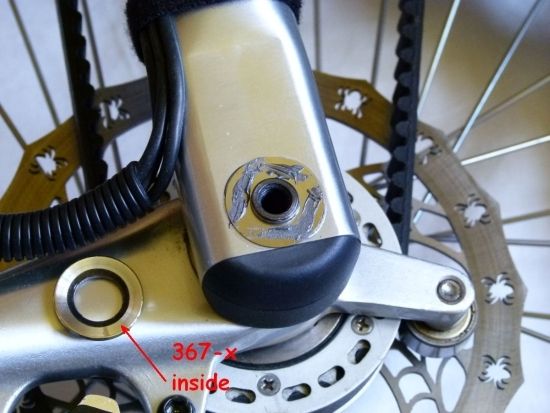
replacement for the previous used part. nr. 363) - 367-x modified Strida cup spring, edge rounded + polished (replacement for p.nr. 367-3)
- 364-x washer M8, stainless steel (replacing low-q. original washer nr. 364)
- grinding tool, grain K 180 sandpaper on beech wood, 26 mm Ø (frame burr removal)
- glass ampulla, content ~ 1 ml “Never-Seez” (anti seizing compound, lubricant)
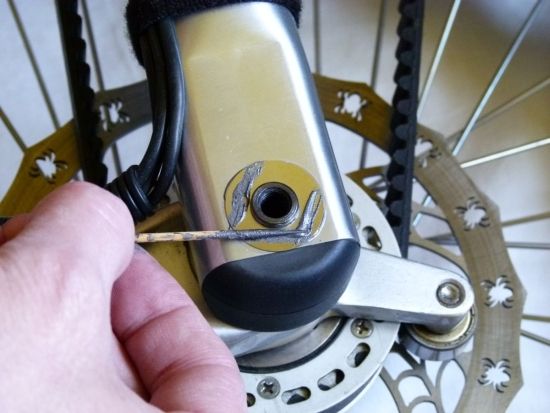
- drawings, data sheet NS, toothpicks
+ bolt version:
added ST-373 rear axle bolt for those who damaged it or don’t have Loctite thread lock
+ clip version:
Generally recommendable seems the use of the plastic frame clip (Strida p. nr. ST-4219) instead of securring the frame tubes by „crossing“ steering and bottom tube.
Please note:
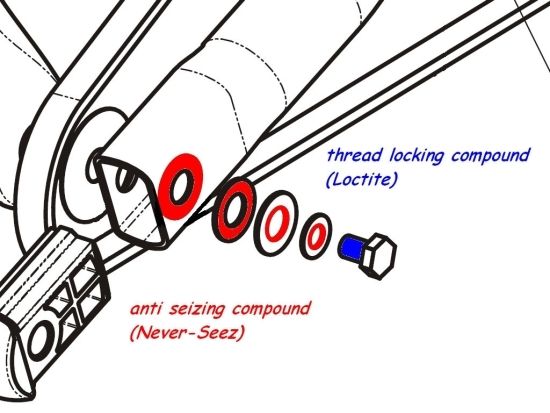
“Never-Seez” is a crucial factor of the system’s function; the amount of ~ 1 ml should be enough for, at least, five times greasing. (It’s not really recommdable to buy a whole can of that stuff for your own; the used grade “pure nickel special” is actually expensive, ~ 50$ per can…and 1 lbs would last for one Strida for several hundred years…)
If you’re using a liquid thread locking compound like Loctite or similar (and not an original new bolt 373) it is implicitly necessary to wait a while – don’t move the rear joint for at least one hour.
So far, there is no detailed installation manual planned, I really hope the image series at Photobucket and the comments at page 2 will be helpful.
If you’re a member of stridaforum.com you don’t need to type the link at page 2; it‘s of course also in your forum mailbox ![]()
Any question?
Please don’t hesitate to ask ![]()
Sincerely yours,
Chris
Besides the kit, you will need also:
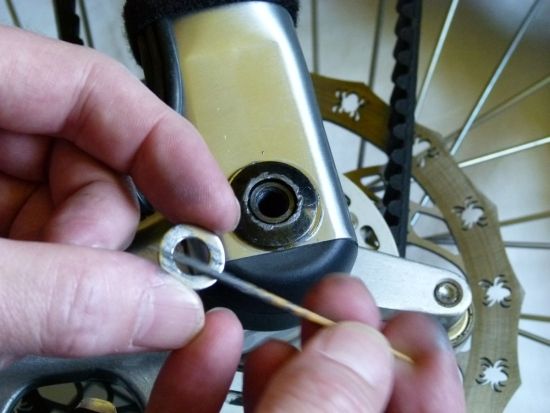
• flat wrench 13 mm
• piece of cloth or paper towel
• teaspoon of alcohol for cleaning (don’t use acetone or nail polish remover!)
• 2-3 drops of oil
Image series 1200 x 900: s769.photobucket.com/user/Blacks … rary/cnrep
Image comments:
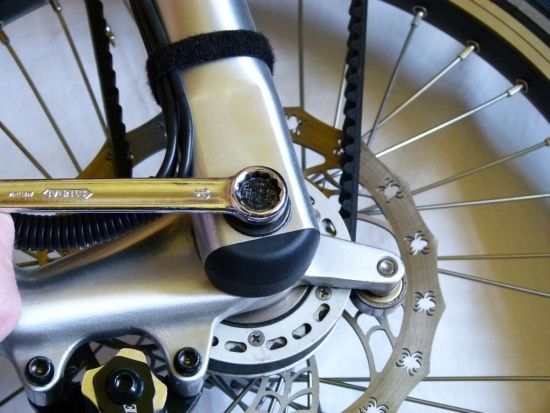
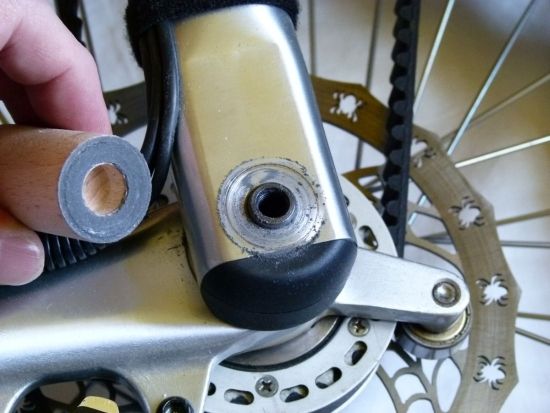
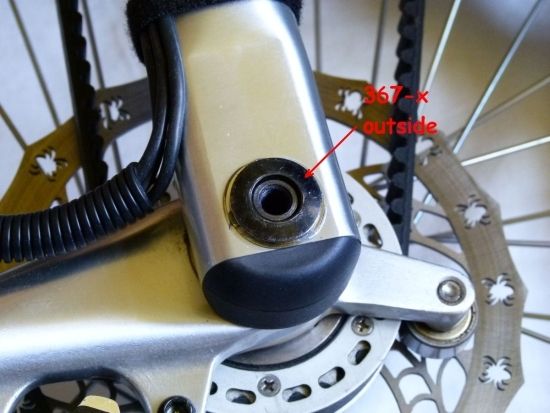
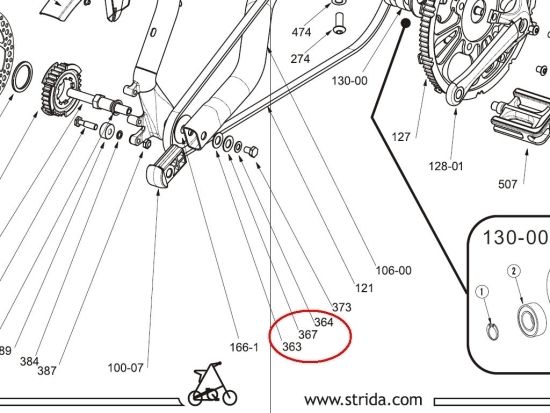
01 – 03: Remove bolt 373, washer 364 and cup spring(s) 367 (363)
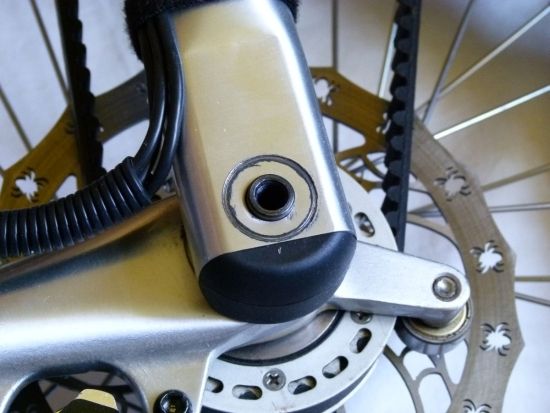
04: Clean from old grease
CAUTION: Be aware of needle-like Aluminium chips!
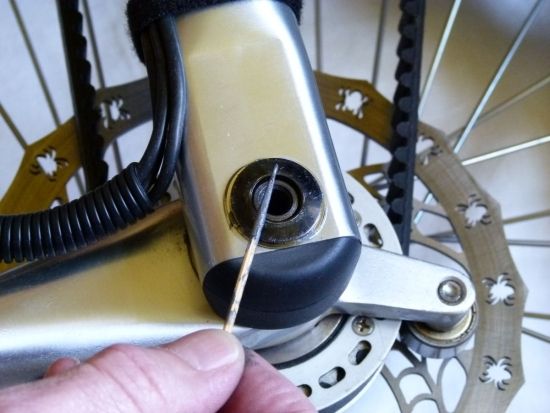
05: Use the grinding tool to remove the burrs in the frame tube
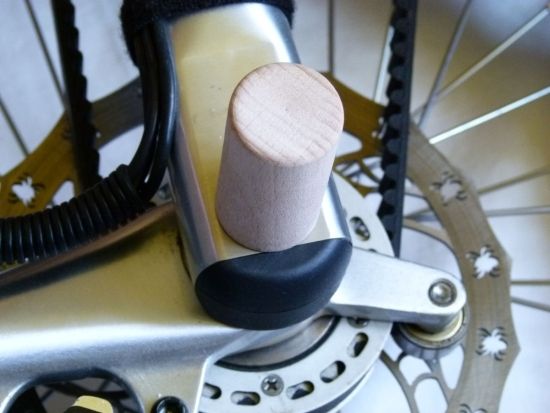
06: Remove just the protruding burr, it’s not required to grind more
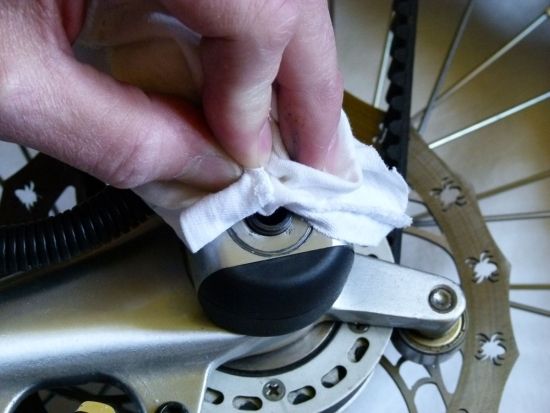
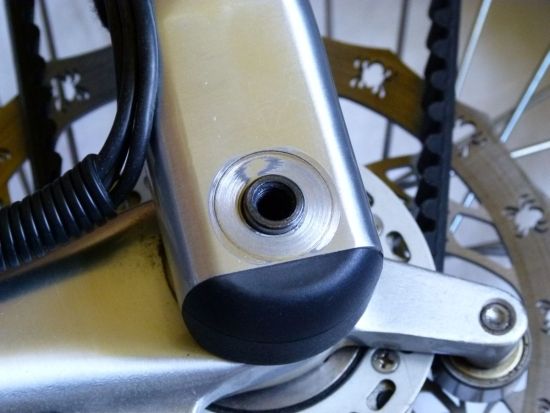
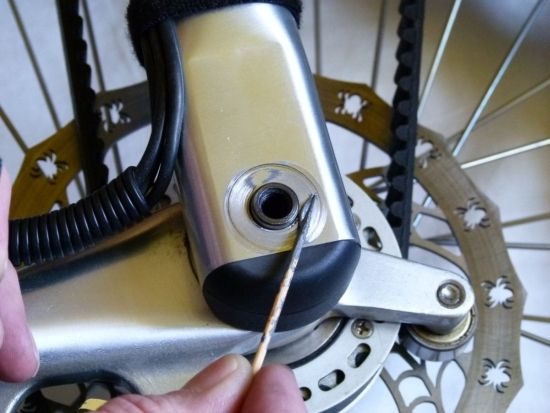
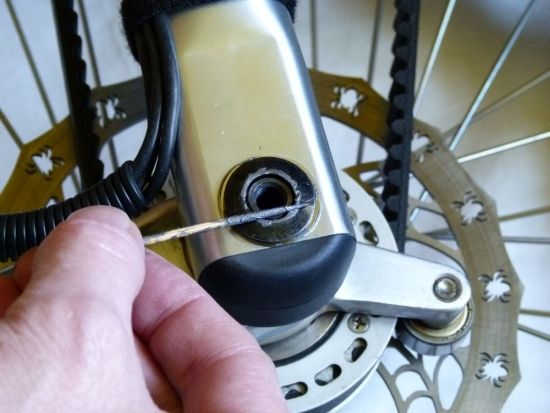
07: Clean again, a drop of oil should be helpful to pick up the grind dust first,
08: and then remove the rest with alcohol
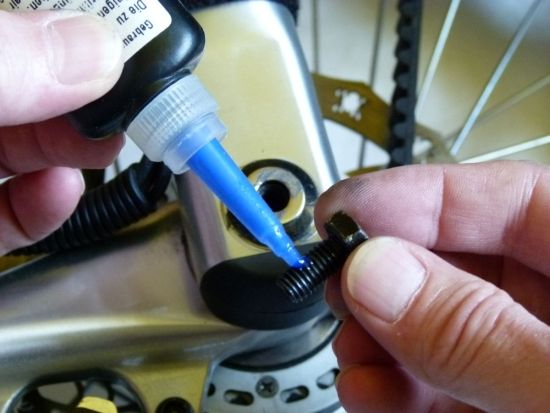
09 - 10: Apply a small amount of Never-Seez on the frame tube
11: Put the thin stainless washer 363-x in place
12 - 13: Apply again Never-Seez
14: Next the cup spring 367-x (black side out, polished side towards tube)
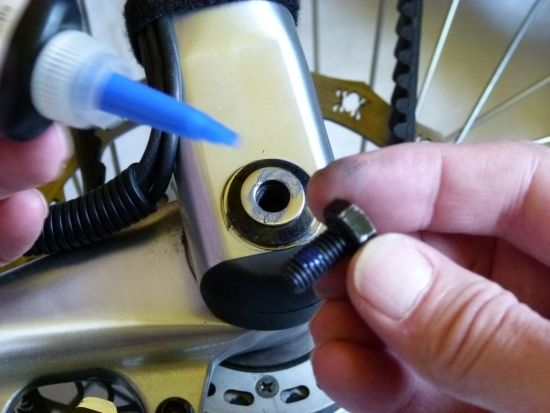
15 – 16: A little bit of Never-Seez on the upper edge of the cup spring and
17: another bit NS on the outside of the washer 364-x
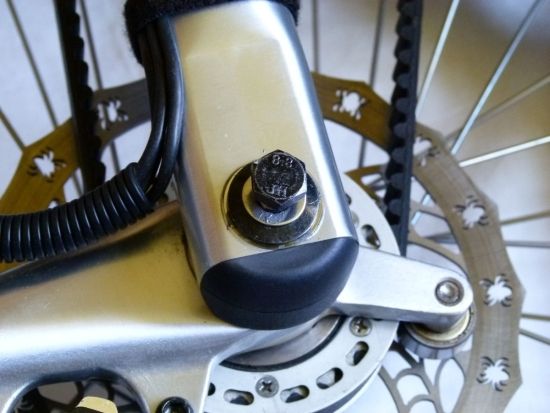
18 – 19: Don’t forget to use either a new bolt or thread locking compound (like Loctite)
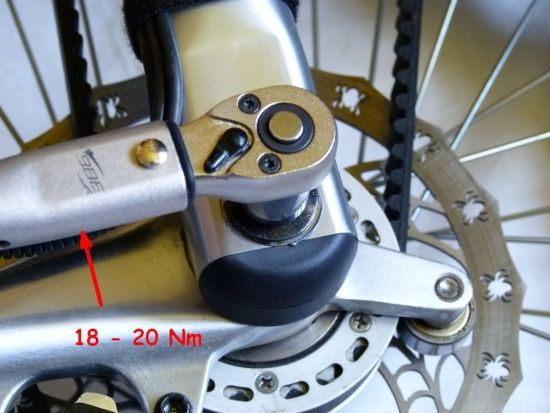
20 – 21: Tighten bolt 373 to 18 – 20 Nm
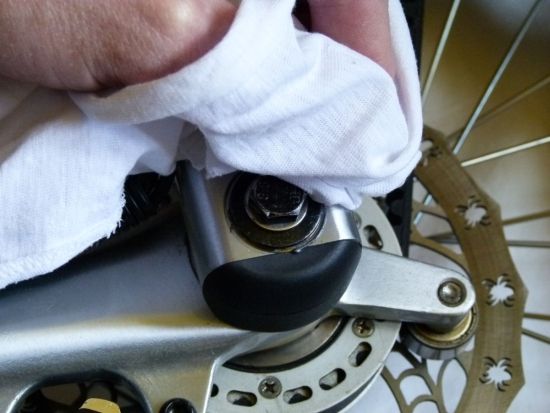
22: Remove carefully the waste Never-Seez
23 - 24: part drawings
25 - : general view(s)
original .docx file dated 14.08.2014